8/01/2020
to day i generated some ideas for my pitch on my synoptic project, and in the end i decided to go with the more fun and random game as i feel like that one appeals to me more than my other ideas and i feel like i would have fun going through the whole process of making the game
Pitch
21/01/2020
My pitch idea is a game were you play a fish with legs and cause chaos in the town, filled with random events and unpredictable scenarios. i personally would vote for my pitch idea as it allows for a lot of creative thinking from the whole team making no idea impossible to implement into the game. personally feel like my pitch is lacking in the design of the environment as i feel like there might be a way to build an environment that will allow me to implement more areas into the environment without having to change another parts of my environment.
I still have yet to create a map layout of my environment to get a base map-out of the environment in my world, i will start to work on this tomorrow as i am still thinking of ways i could design the environment to allow certain events to happen.
I believe my idea is realistic and achievable as the world of my game could be easily build up and fully textured then the events could be added over the top of that and as we go with development it would be easy to add more random events into the mix as all we would need to be doing is adding events like cars or planes crashes instead of altering the majority of the environment or even expand onto the environment with new buildings.
Pitch slides
23/01/2020
Here are the slides for my pitch idea

Here is my mind map for coming up with the ideas for my game, as you can see i had the idea of a thief at first but then i had a random idea of a fish with legs that causes mischief and i thought that kind of game would have a lot more comedy values to it making it fun game to play and would make the development of the game fun for everyone as well
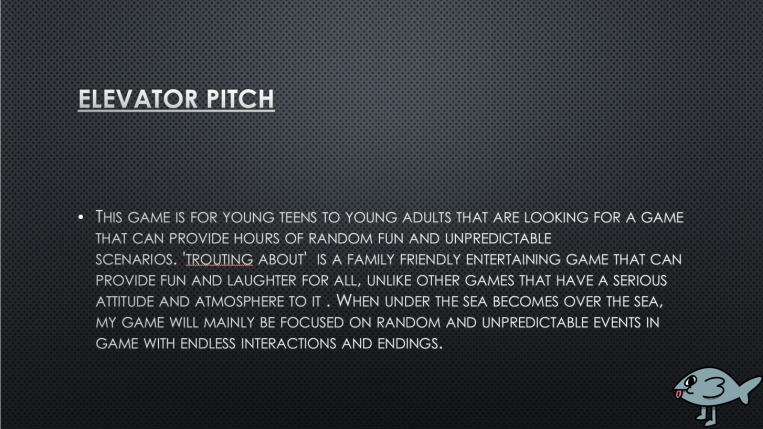
Here is my elevator pitch for a basic insight of the nature of my game
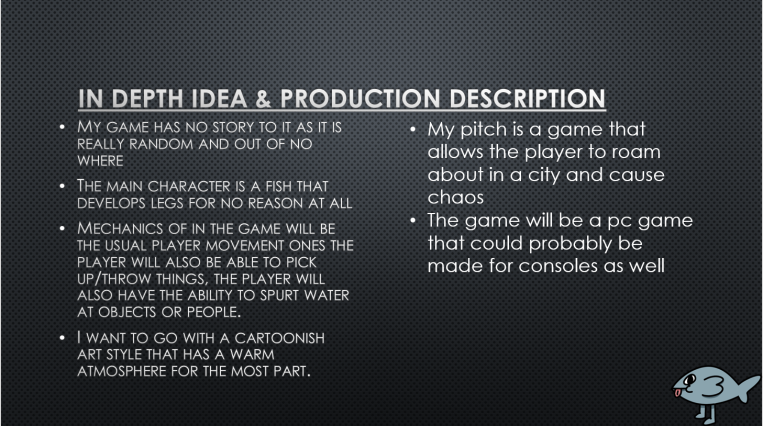
Here is an in depth and production description for my game to give you a detailed description for the vision i have for my game
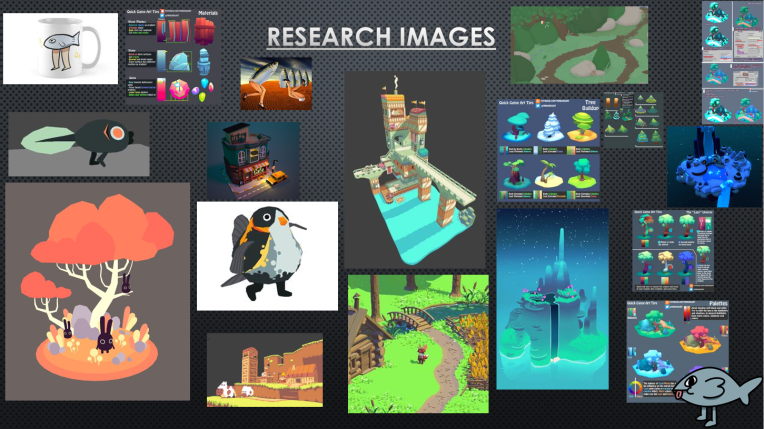
here are my research images i looked at for my pitch as these images really gave me ideas to envelope my idea even further
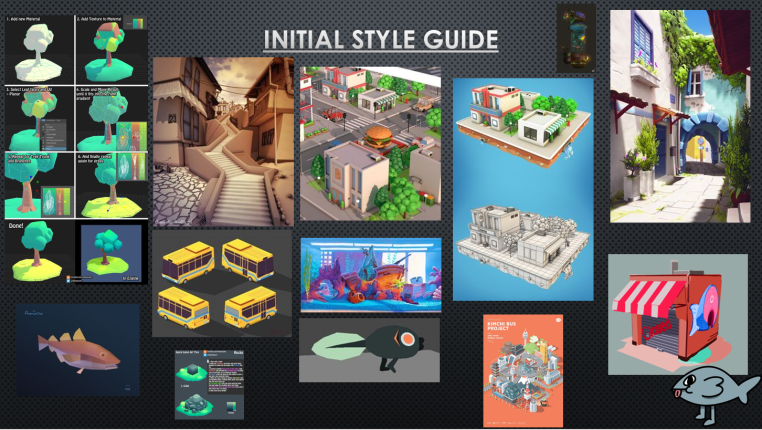
Here are my style guide images, these images gave off a great stylized image and i would love to have my game follow in this style as i feel like it would fit the cartoonist atmosphere the game will have
Here is my Target audience and market research
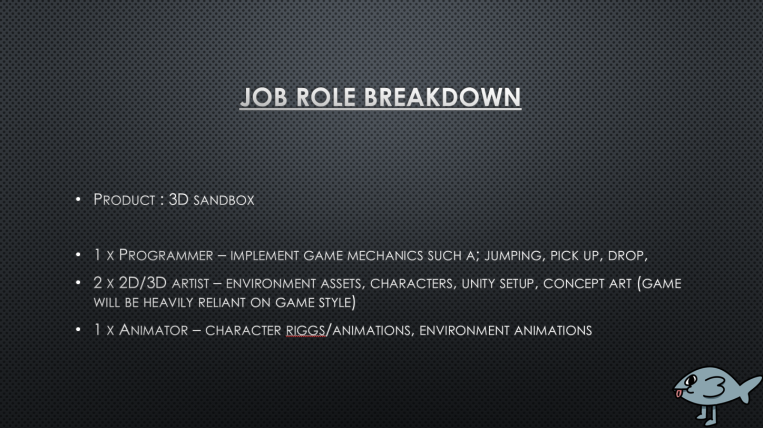
Here are the job roles for my game – i would be the leading artist for my game if i end up working on it

Here are my MVP goals for the game, i would really like the game to just be played ion the scene of moving about the environment
Here is my stretch goals – i would aim for a more larger environment packed with more events that can lead to multiple ending, also would have a small range of customisation options
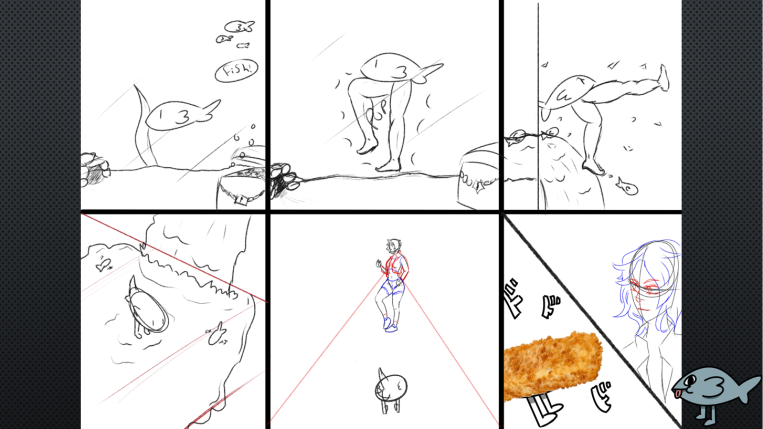
Here is the first story board
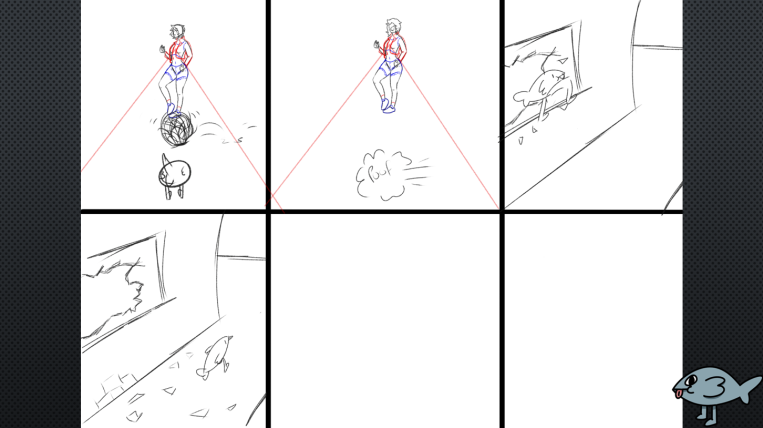
Here is the second story board
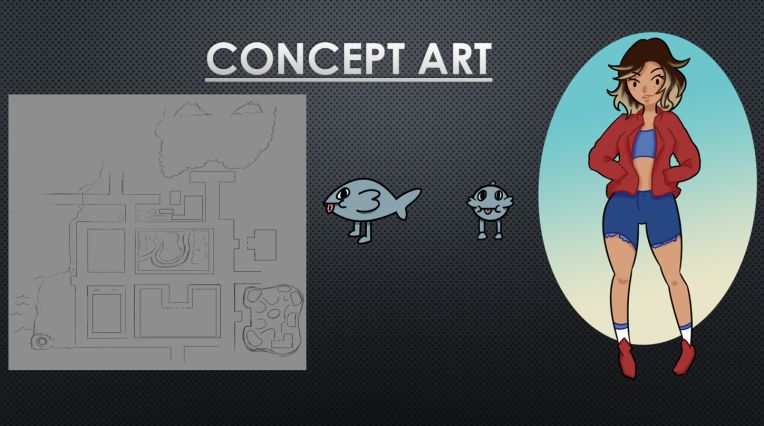
And finally here is my concept art for the game; a rough map-out of the town, the main character the fish, the woman in the story boards as i feel like she could become a reoccurring character in the games events
Pango-monium
Week 1
27/1/2020
Pango-monium is the name of the game i will be working with my team consisting off the 5 of us (Aleks M, Aimy C, Daniel C, Charlie P and me). Pango-monium is originally Aleks’s pitch that the 5 of us decided vote on, all having various parts to play in the creation of this game;
Aleks – leader, concept artist, 3d artist and animator
Aimy – 2D & 3D artist, concept artist
Daniel – coder, level designer
Charlie – 3d artist
Me – 2D &3D artist, concept artist
Soon after establishing our team we got straight onto organising and creating our documents for our pre-production work to plan out our whole course of action to create this game to best of our teams ability.
29/01/2020
i soon started to work on concepts that would be needed for our game, i started to work on some very sketchy simple concepts for the environment.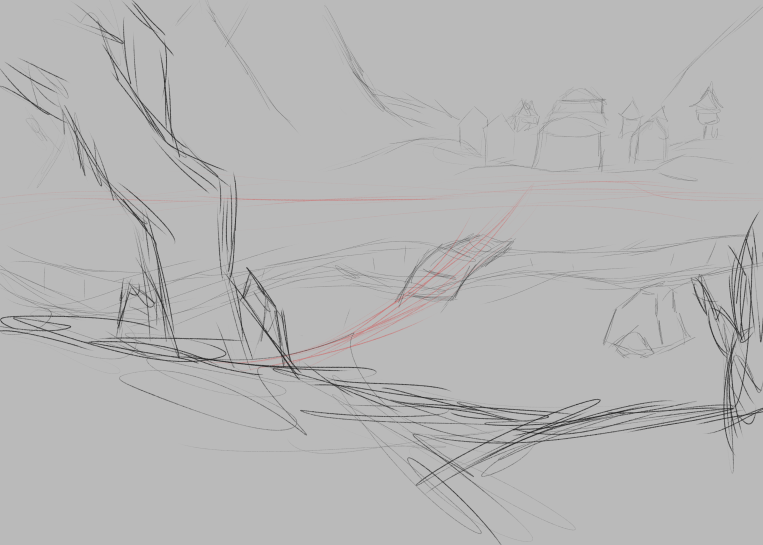
i went for a very simple design just to save time and give our teams some ideas for the environment and how the environment around the town should look like or feature.
30/01/2020
to day i decided to work on concept art for our asset list as our team had came to a conclusion on how our layout of our game should be like, so with that in mind i deiced to get started on working on some assets concepts for our environment.
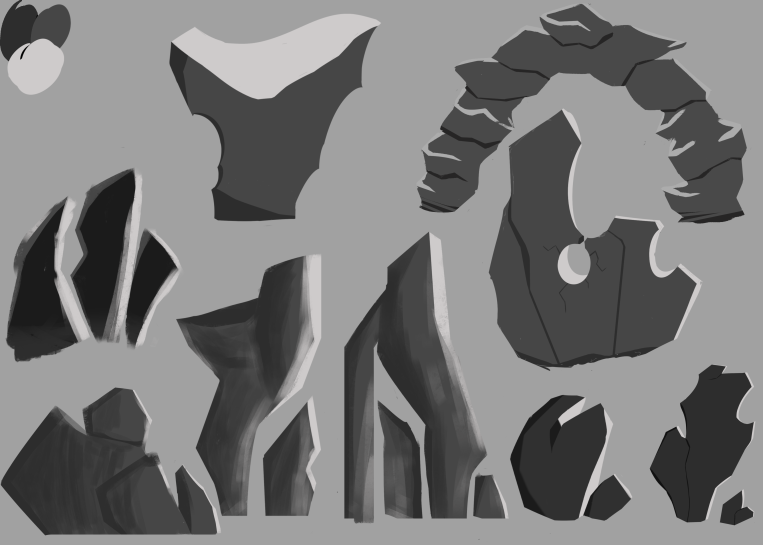
i decided to do a lot of different variations of rocks, drawing inspiration from western style cartoons and illustrations as these had much more creativity with the form and shape of each rock.
Week 2
3/2/2020
I deiced to work on more of my concepts for our assets, i decided to work on the trees we will the needing in he game so i started to look at many dead trees that you can find in baron wastelands and the different variations of them.

Here are some concept designs for the trees, i feel like i could have went into more details on the trees and maybe make them more varied in design as they all look a little similar to each other, but in the end its more so getting the idea across to my team and seeing if they approve of the tree designs or would like there to be changes made to them to improve them.
5/2/2020
i managed to work on the technical consideration a bit but i was unable to finish it off as i needed the assistance of an abasent member so the rest of that will have to wait to get completed, further more i decided to get to work on more concepts for the assets
 Here is a concept for the street lamps for the game, there wasn’t every many images i could find of this on the internet so i had to make do with a few pictures of oil lamps from western times. i feel like i could have put more details into the design but there really wasn’t very much i could add to a oil lamp on a wooden post.
6/2/2020

Here are some quick concept sketches for the shape and form we might consider for the towns sign to have in the game. i looked at a lot of western styled signs however there wasn’t many that were build for a town on the internet to get some inspiration from.
Week 3
10/2/2020
Here is another concept i created that i felt like would really fit in with the games style and themed environment choice.

I deiced to go with a few different design choices for the cacti to see which ones would best fit the games style and which ones would either need improving or scraped, i also asked for my teams opinion on this matter and we came to the conclusion that it would be better if we can try and stretch for all of them to be implemented into the game in a way. I also i am pleased with the outcome of my concept as i feel like i have vividly portrayed my idea to the team so we can come to a decision about the games environment together.
Week 5
27/2/2020
Here is our block out of our game so far, as you can see we have the basic movement down for our character to roam about in our blocked out layout of the map. We also have a point system already in the game to give some meaning and purpose to the early build of the game while am sure the system will be more fleshed out as we go throughout our production phase.
Week 6
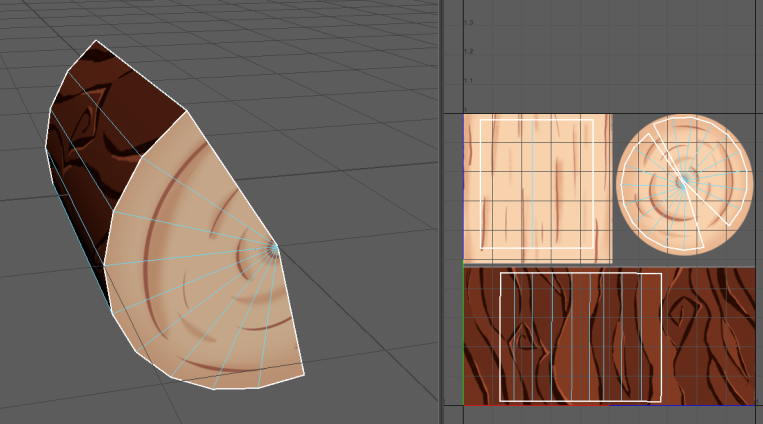
now that i, finally finished with my pre-production phase, i can start to move onto my production phase. The first thing on my personal production schedule was multiple logs to make them stack in the environment to build a stack of logs to act as fire wood in the environment, so with this in mind i decided to make a reusable texture to one save time and second to allow me to make the textures hand drawn because i feel like a hand drawn style for the wood would look really nice compared to something so realistic out of substance painter.
Here is the hand drawn texture i manged to make in Photoshop, i wanted to go with a scruffy and rough style on the out side of the log because i really felt like it would represent the roughness of the log on the outside.

Here is my first finished log i made, i am really pleased that i decided to go with a hand drawn style for the logs as i feel like they came out extremely well and i am very pleased with its style as well as i felt like it would be best fitting for the game. The other logs that i made are using the exact same textures but their models are both smaller and bigger than my first log i made so with that in mind i made sure that my textures were big enough to fit for all of the other logs as well, due to the way i modelled some of my other logs we were able to make it were if the character came crashing into the logs they would end up shattering into smaller pieces which i think was an amazing idea and really cool mechanic to have for this style of game play.
Burndown Synoptic Middle of week six
Here is a little update for our Burndown feet for week six for our project to show all of our work that has been produced and a way to predict if we are falling behind on work or if we are gonna end up being ahead of schedule.
Week 7
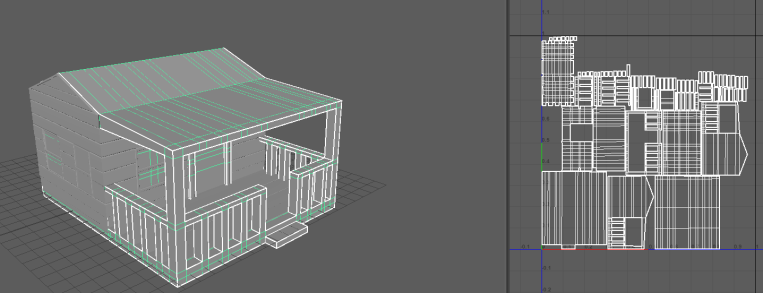
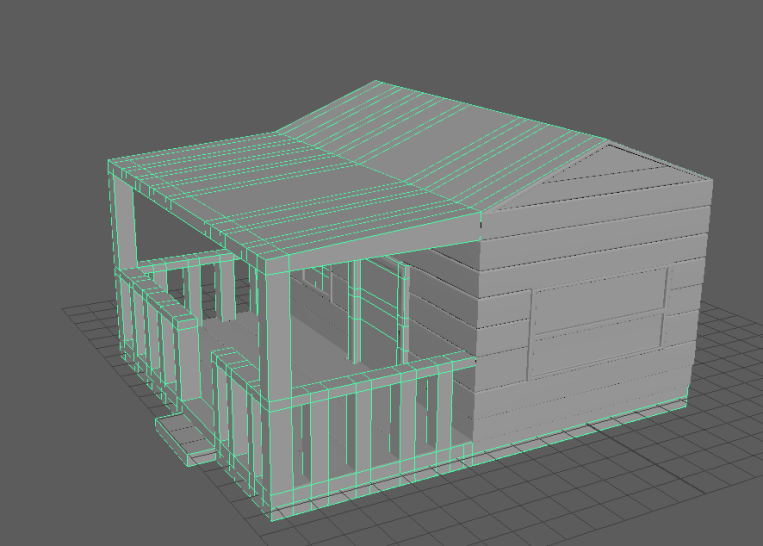
for this week my main thing on my schedule with the highest priority is the small houses, i decided for this to take priority because it could be used to fill up a lot of dead space on our environment or could be used for place holders for our MVP to make it look more fleshed out, they could also be used multiple times in the environment as i plan on having the original model have a few different textures to it to save time with making another house.
Here is my house model so far, as you can see i deiced to bake on the windows, floor boards and the wooden boards across the house, i only ran into one problem when doing this tho and it was when i was trying to make the wooden wall boards i had some problems with the faces not beveling correctly which ended up making it look like a mess, this issue mainly appeared around near the top and bottom of the windows i made, i solved this issue by seeing which parts were messing up and trying to fix some of the vertexes from mixing in with the ones in the windows. all apart from that i can say i am quit pleased with my progress so far.
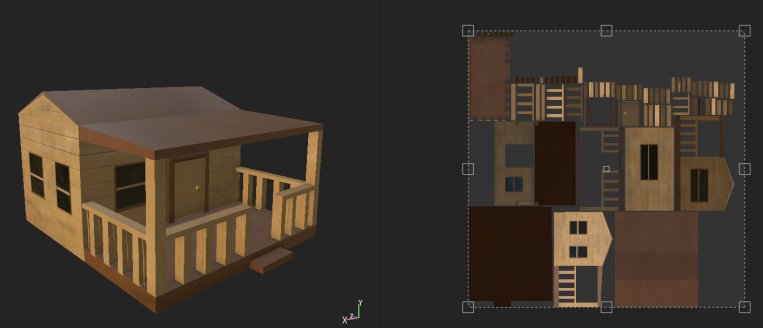
Here is my final product and i can only say i am quite pleased with how well it came out, i wanted to go far a not to bright but also not to dark of a colour for the main bit of the house but i also didn’t want it looking to similar to the ground in the game because it would just end up looking strange if it were the same colour so i settle on this colour, i also feel like this colour would reflect well with the sun in the game. i really wanted to make the house looked like it belonged in a western environment so i decided to go over the house with a bark rush and gave it a dark brownish colour to make it look like it had dirt and dust running up the sides of the building which also gave the house more detail and texture to its whole model. Overall i can say i am happy with the way the whole thing came out.
Week 8
Due to me just adding another texture to my house model instead of making another one i am now ahead of my schedule and i will be now moving onto making the bank for my game. For the bank i want to try and make it as best as i can because the bank will be an important asset for the game as we know many western town has the town bank in it so i wan to try and take my time and make it as good as i can make it be.
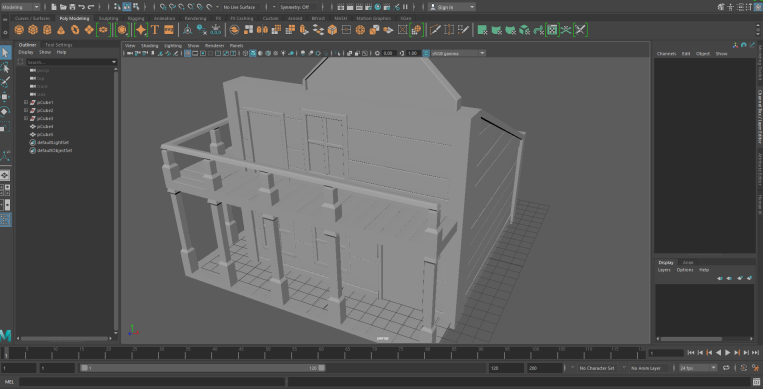
Here is my progress so far, i can say i am quite pleased with the quince shape i chose for the bank. i am now just preparing to go onto making the high poly version of my bank because i want the bank to look the best i can make it be as i do have the time to do so.

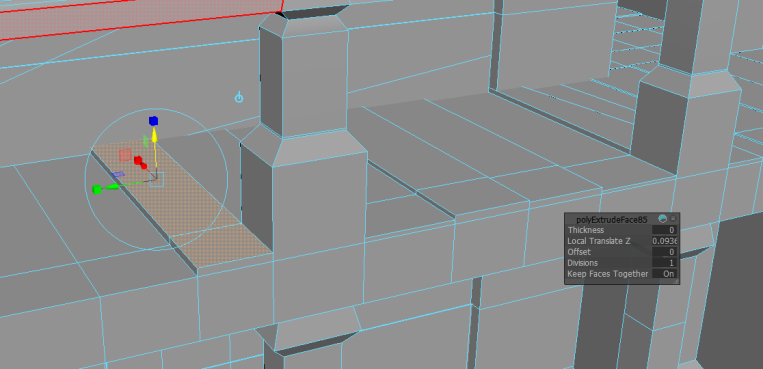
Here is a little update and a look into how i am making the high poly version and what i plan to do with the extra parts i extrude and make, i plan on beveling all of the lines on the floor boards and on the walls like i did with my small house to really give my model more depth to it.
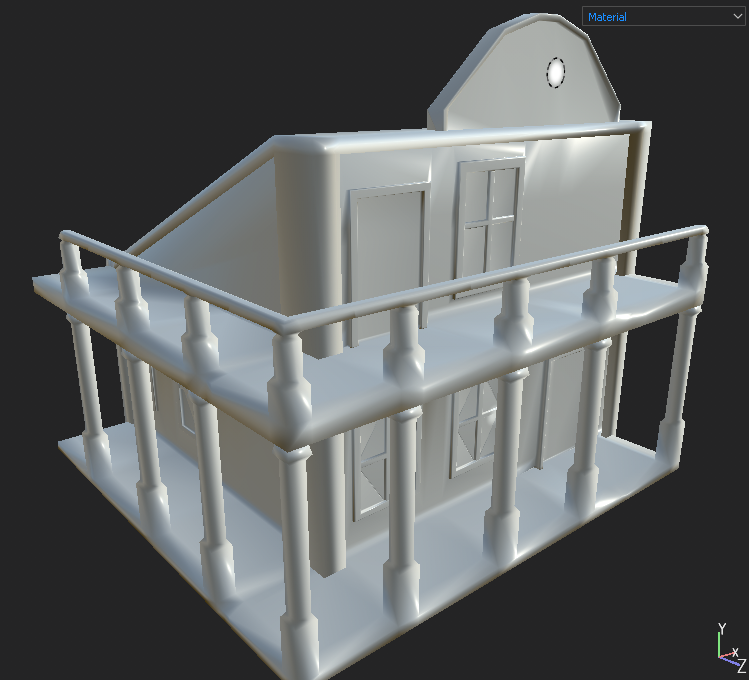
Here is my high poly bank version fully finished and i can say i am very happy with my outcome of the high poly version as i feel like it really has given my model model a whole lot more of depth and detail to it. However i did run into a few problems with my high poly version, the problems were just the same ones i had with my house model but just a lot more of that, the there was twice as much this time than last time so the way i came about getting around this was by skipping one of the loops around the house then doing the next one then skipping another one just to make it constant all the way through. Besides the problems i face i am quite happy with the outcome of my high poly version very much.
Also here is a little update on our progress so far shown on our burn down sheet for week 8
Week 9
Here is a little update on my bank and i can say i am deeply saddened to find out that there was a massive issue with my model once i brought it into substance painter, i don’t really know how this problem came about i also asked my whole team for help on this matter but sadly they couldn’t find out why either. I then came up with the idea to just try and bake my high poly onto the low poly and maybe the whole thing might either fix its self or look somewhat better, sadly i was wrong but i wasn’t about to scrap my whole thing yet because ive put so much time and effort into this so i wanted to try and make it work.
Here is my bank model fully textured and done, i can proudly say i am quite happy with the look and overall way the bank came out like. The way i managed to do this even with my full thing messing up completely was i scrapped the low poly version of the bank, UV unwrapped the whole thing brought it into Substance painter it was still a little messed up like the low poly one but it was a lot easier to work with by far. I soon started to work for hours trying to make the bank look so nice to the best of my abilities (which i can say work quite well) with the many brushes, materials and tools substance painter has to offer.
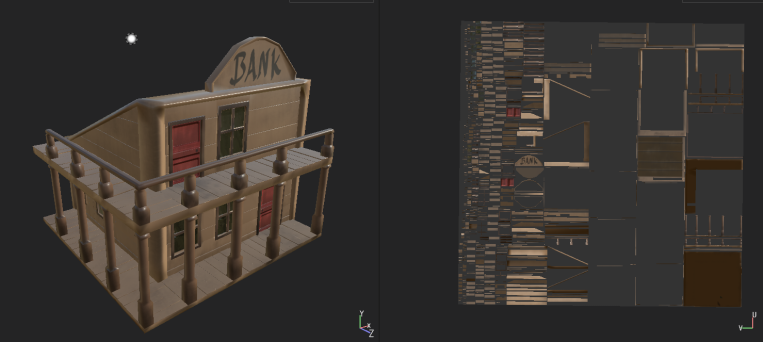

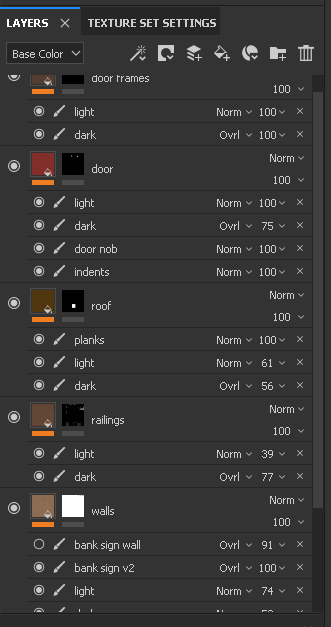
As you can see it took me so many layers to try and mask all of the bits that messed up on my model, i really ended up playing around with the bark brush a lot to try and add detail and depth to my model quite a bit, i also ended up using the brush to try and add highlights to some parts of the model for more detail. Just when i thought i was done i started to mess on with the layer settings and i can say it was much worth it, I started to put on Overlay on some of the layers which really made the colours blend well with each other which started to make the whole thing look 10 times better in my opinion, i also started to mess on with the opacity to make some of my brush work more faded to made it really resemble the dirt and dust coming form the environment.
Overall all i can say is i am really impressed with my artistic skills and my abilities to really turn my model around from something i dreaded id have to scrap to becoming probably one of my most proudest pieces of work yet.
Week 10
This week i now plan on working on the barn model for the game, our ideas for the barn is that it will be an asset the player can walk into and destroy the stuff inside the barn to gain points to complete the objective.
Here is my barn so far, ive talked to the our teams coder and the way our see through walls when the character is behind them mechanic works requires me to be making the all the parts of the barn separate as in all the walls roofs and floors so that each part of the asset can be seen through so the player can actually see them self through the barn when they enter it.
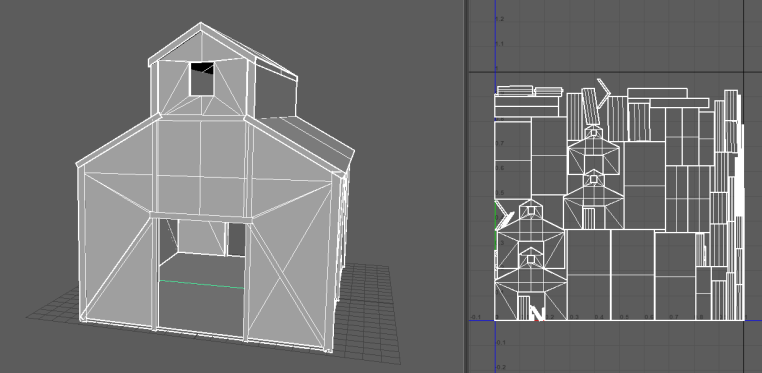
The only issue ive had so far with this model is when ive tried to automatic unwrap (yes i use automatic unwrap because im lazy and don’t feel like spending ages unwrapping my model just to get somewhat the same results in the end) it ended up being a complete mess and the UV checker board thing was a complete mess to look at so i had no other option but to painfully manually UV unwrap my whole model, however this was kinda worth it because the UVs look so much better than before and it also allowed me to free up space by not unwrapping some faces that you will never be able to see.
{Here is a quick little update about production schedule}
we have updated our production schedule because we ended up cutting some things like NPCs but however depending on how quick and well we work there is a possibility that they will be added back
Here is our old seclude if you’d like to take a look at that
MVP
Here is our games MVP and i can only say that i am really impressed with my teams outstanding work and how well we really made an environment come to life while also keeping an constant style to the game throughout development and the game isn’t even finished yet so i can only image how lively the game will turn out once we have completely finished the game.
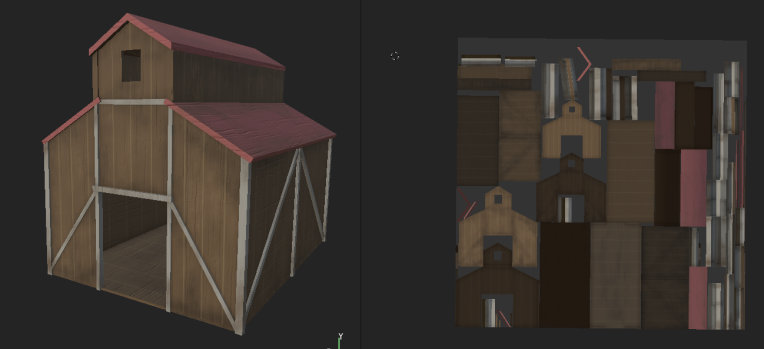
Here is the final product for the barn house, i really liked the way the colours turned out the most i just felt like the white and red really complimented each other quite well. the most important thing i added to this to make it perfect was a martial i found that was called stylized wood and it really made the whole model pop and really gave it the style i desired for the barn, also there were still a few touch ups i did to really make the model belong in its environment which was adding dirt and dust to the model, doing this really made the model feel complete and i am thrilled with the results of it.


Here are 3 different tree models i created, i had look at quite a few references to really give me an ideal image for the trees and these were the results. By far i would say the 3rd tree is my favourite as its way more unique than the other two and i put a lot more thought into how to variate it from the other two as i thought having 3 trees standing would be a more boring scenery to have so i thought i might change it up as much as i can.
Week 11
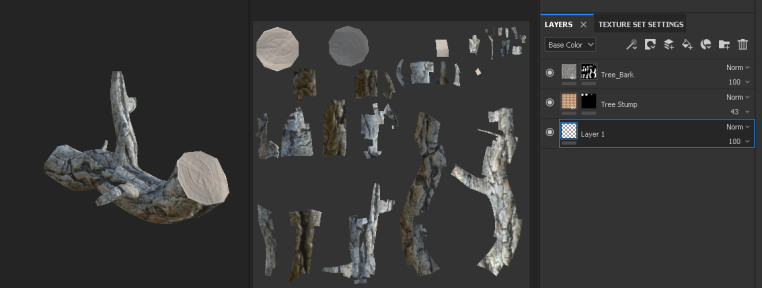
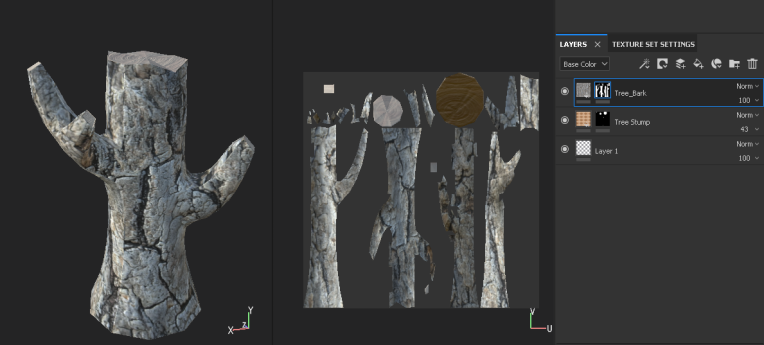
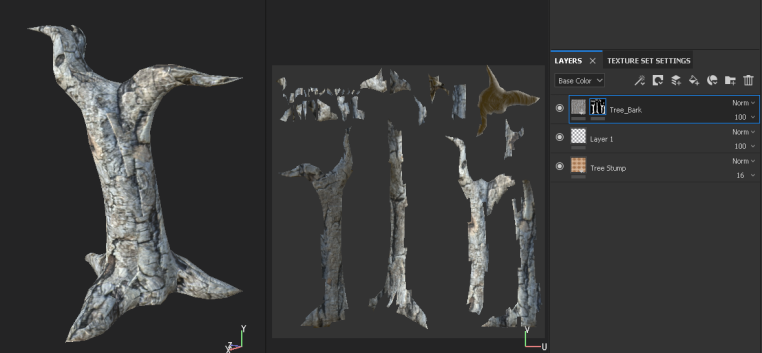
Here are the 3 trees fully textured, i took quite the time trying to find a martial that i thought would fit the western style of trees but all i came across was the normal looking tree materials so i yet again went searching on substance shared to yet again come across the most optimal material that best suited my ideals and standards of the trees, I also found another material that i thought would go quite well with it which was the Tree Stump material that i ended up tuning the colour of to fit the Tree Bark material, i also thought i could use the tree stump material for the split versions of the trees (split versions are just broken versions of the original model, so in game when the player smashes into them they brake).
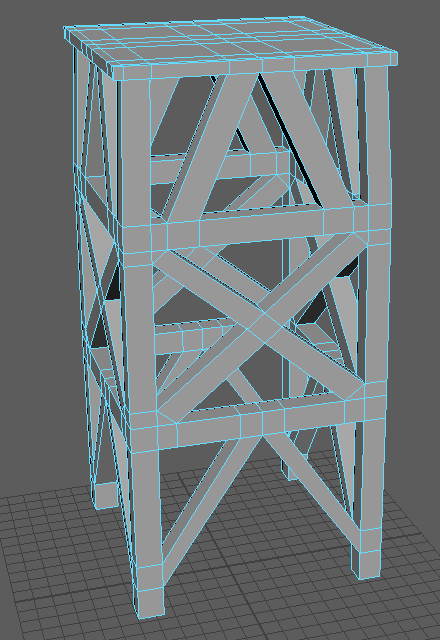
Here is the beginning of the water tower model i am in the middle of modelling, the water tower wasn’t originally one of my models to make but one of our team members pc isnt able to run the required programs to be able to model so they have had to resort to other means of work for this synoptic project. Anyways , i struggled quite a bit while modelling the stands of the water tower because i wanted to try and make the stands something more unique and not like every other water tower you see, this resulted in me taking quite a bit of time to try and perfect this look.
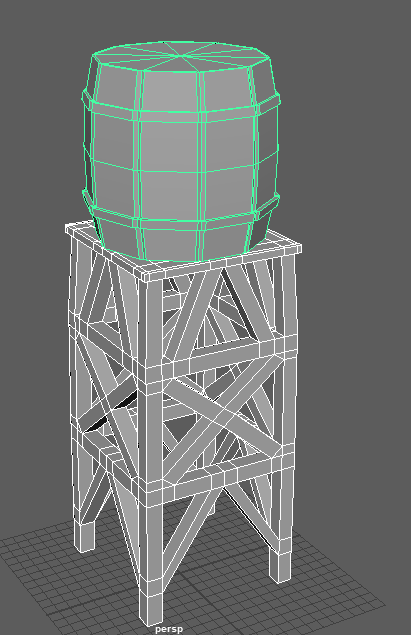
Here we can see i have almost finished modelling the water tower the only thing left is the rest of the barrel and the top roof bit for the barrel as well. i shortly was able to finish modelling the rest of the water tower in no time and i can say i am quite pleased with the way it has turned out.
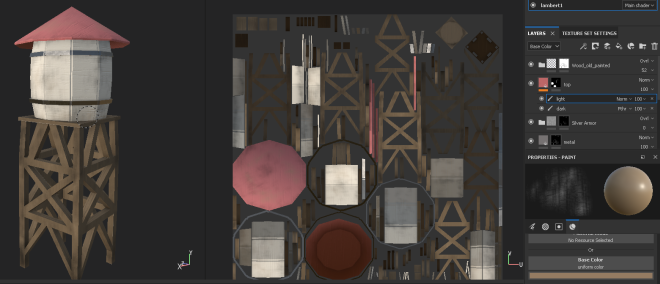
Finally, here is the final product and all i can say is that i am really happy with the way it turned out especially after the amount of time i spent trying to make this perfect, the only trouble i had with this was its UVs and that was only because it became really tedious to try and make all the UVs fit in place and fix all the ones that i almost missed that messed up a bit. But beside from all of that i had no issue and i really enjoyed texturing the Water Tower as i found it mesmerising to see how all the layers would stack on top of each other to make up the water tower and to see how all the little details i added like the dirt and dust can really build up your final product.
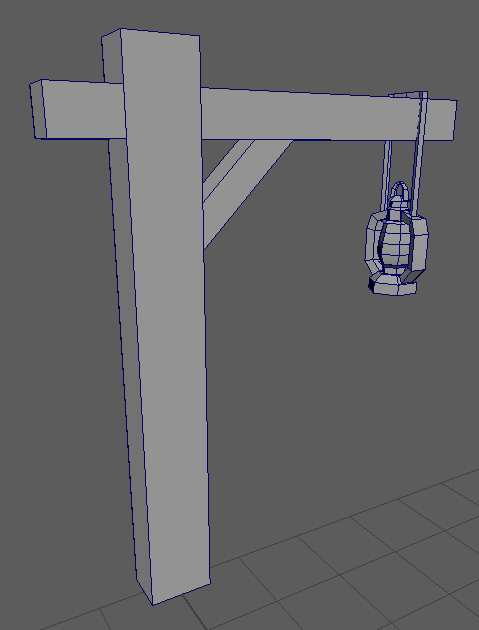
Here is a simple model i made for one of the games street lamps assets, i was looking at quite a few references of oil based western street lamps but there really wasn’t may to get much ideas from which lead to me making a one as simple as this.
Week 12
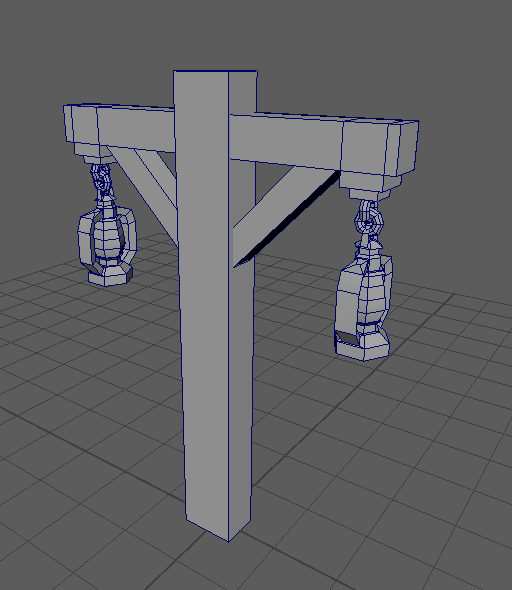
Here is another street lamp i made, i tried to go with some what a more complex design for the street lamp as i felt bad about the lack of creativity of my first lamp.

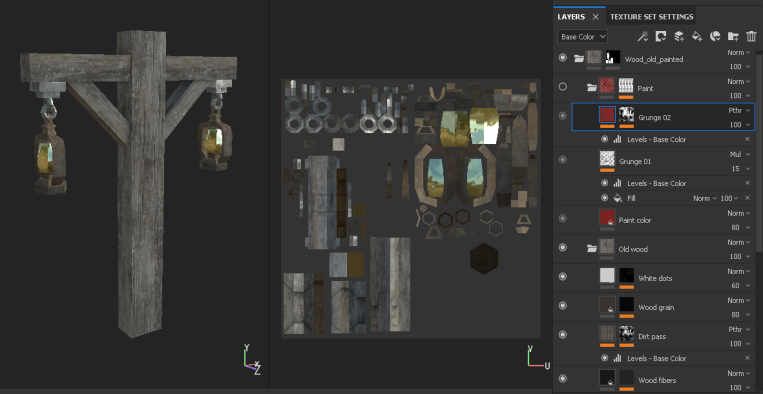
Here are the final products for the lamps, i pretty much used the same materials for both of the models for the sake of consistency. But however i really do like the way they turned out , i really do like the materials and colours i chose of both the wood and the lamp, for the lamp i chose to go with the glass visor material as it best suited a reflective surface but i also added the Matt finished Glazed to really give the glass on it a dirty look which did comes out really well especially with that shade of yellow as well, i also liked the way the metal material i got of substance share really gave the metal a rusty look which made it perfectly fit the environment. With the wood i loved the way the wood material really added them indents to really make it look like planks of wood. Overall, all i can say is i am quite pleased with the colours and the quality of the whole products together.
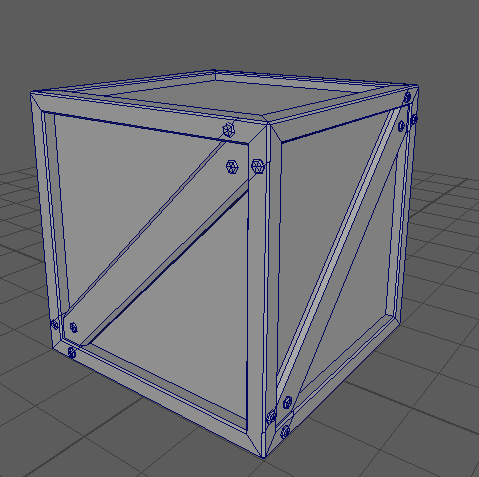
Here is the model i made for the crates in the game the design looked a little plain so i decided to add sum nuts and bolts to it so it doesn’t look so plain. I plan on only making one crate as i see it being able to be reused over and over again to fill up dead space or to be even used to block of some areas in the world.
Update
Here is a quick little update on our games progress so far with some of our new assets added in now and some new sounds present in the game now like the menu music and having the option to control the volume of the game in settings.
Week 13
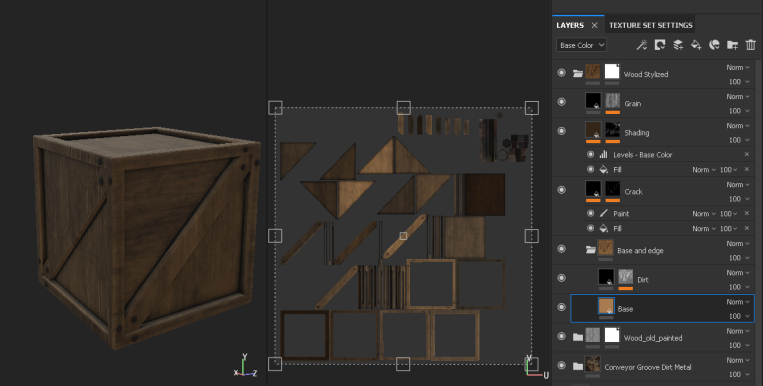
Here is the finished version of the crate i modelled, i am really pleased with the way this turned out with the material i used for the wood worked really nicely with the amount of dirt it made for the crate making it fit really well in its western style environment.
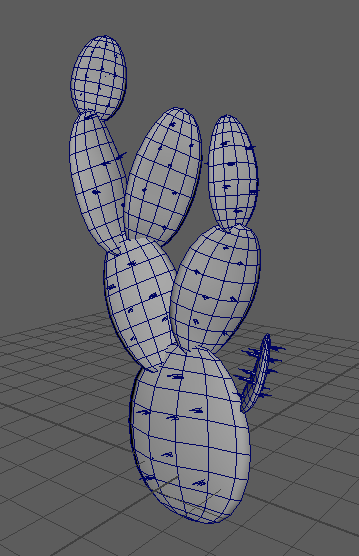
 Here is the model for the first cactus i made for the environment, i looked at a lot of references for the cacti, i looked at peoples photographs of cacti, peoples 2d art work and even their 3d work to get a good feel and understanding of the way the cacti is shaped and formed.

Here is the second model i made for the cacti, i am really trying to aim for vary different variants of cacti to have a wider range of different assets in the environment instead of the same thing just scaled and re-skinned, with these cacti i looked a lot at succulents in households to give me a better understanding of how they grew and form, which lead to me making these ones because i really thought it would be better to have a variant of one were there just a cluster of little ones.
Here is my third variant of cacti, this one was the most difficult one to model out of all 3 due to the unique way this type of cactus is formed and shaped as i struggled to try and have each bit of the cactus bend in separate ways but still be able to make it look right at the parts they branch out at.
Due to my uncertainty with the cacti i asked my team for help on how they think of the cacti, which they suggest they look really good they way they are but they suggested putting spikes on them, this resulted in me going back and forth updating each of my models to perfection before i start to texture them.
Week 14

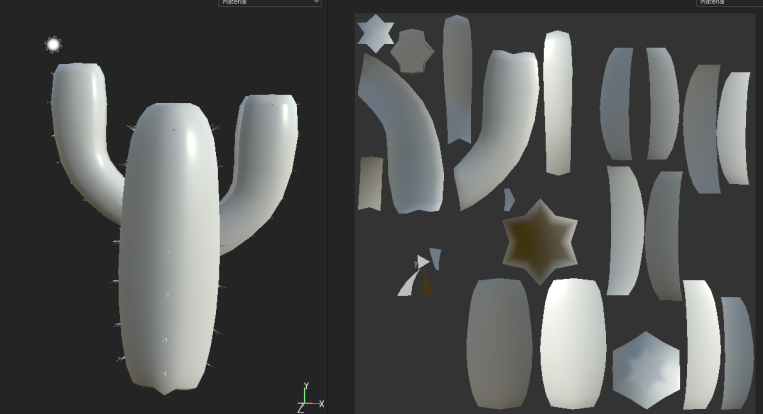
Here is the first cactus fully textured, at first i kinda struggled on thinking of a way to start texturing this because there really wasn’t any materials made for cacti and even the ones on substance share really wasn’t going to fit the games style as well as my models shape and size. I soon realised that cacti kinda have a leathery look and feel to them, so with this in mind i decided to look through substances leather materials which i soon found the perfect leather material which was the Leather Stylized one, i settled on this one because of the way it made them dark patches on the cactus which really made it feel like an actual cactus.

I ended up messing around with the layers to try and find the best results i could to make it look more of a cactus but didn’t end up doing much.
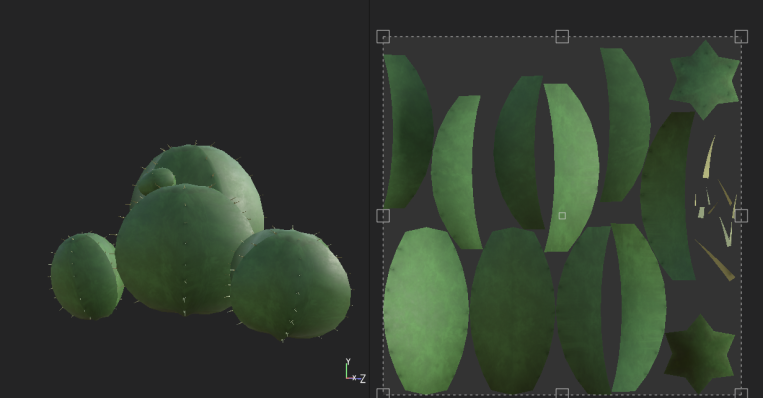
Here are the second variant of cacti, i am really pleased with theses ones the most as i feel like material came out better on these ones which i have no clue how that came to be or it might just be i like the composition of cacti and the way i made them look. over all there defiantly my favourite.

Here is my third variant of cacti, i do like the way the material worked on this cactus but i really think what worked for this one was the way the spikes were made compared to the other two cacti. I saw on a lot of my references that these types of cacti had had vary sharp and long spine sticking out of them so i am glad i paid attention to this feature on them.
Update
Here is a quick update video to our games progress so far and honestly all i can say is that i am so impressed with the progress and effort that has been made by all my team mates to really push this game forwards into something that was a simple concept into this very lively and entertaining chaotic game.
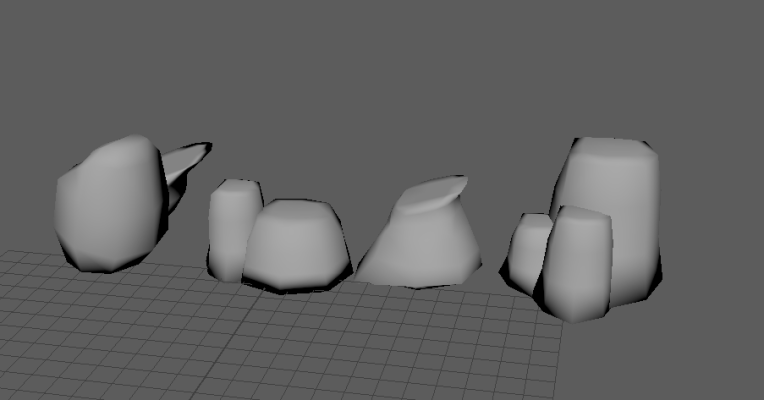
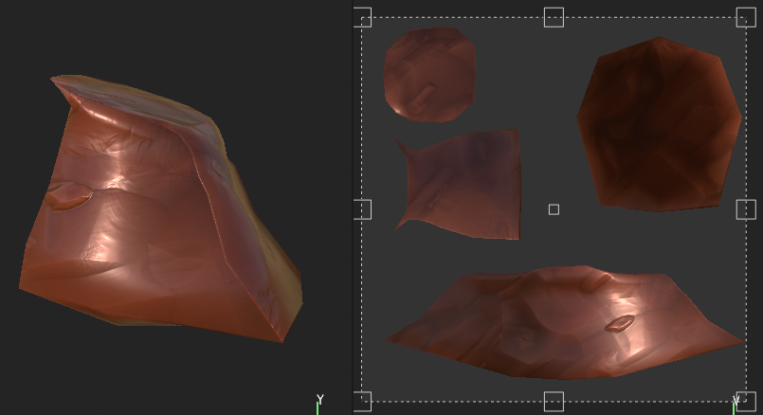
Here are the models i came up with for the rocks in the game, it really took me quite a few hours to try and come to these models as i ended up getting quite frustrated with some of the ones i was producing as i felt like they didn’t look perfect enough for the game or their shape and form looked nothing like a rock. so in the end i came up with these 4 rocks, i feel like these 4 rocks would best suite the games style. i ended up looking at a lot of references of rocks to help me produce these 4 i had to go back to my concept pieces a few times to try and steal some bits i liked about them and i did some little sketches on paper of some merged with other parts of the rocks i liked.


Here are 3 of out of the 4 rocks i made. While trying to texture these rocks i came across the most amazing texture that best suited my vision for these rocks however once i tried it, it left horrid lines in the model all over which lead to me having to redo all of the UVs for my rocks just to makes them look some what better, however in the end i couldn’t get rid of all the lines with out greatly messing up my UVs and i can live with that because at least i tried all i could to try and improve my assets as much as i can. Overall i really love the material on these rocks as i feel they will look great in that style of environment and the way the scorching light will be echoed of the rocks.
 Here is the 4th rock, i left this one out as i wanted to talk more into the design and purpose behind this rock. While creating this rock i had a reason for its shape behind it, the way i shaped it was to act like a ramp in the game as right now we haven’t got anything that will let the player be able to ascend throughout the air and come plummeting back to earth into our breakable assets. with an assets like this in the game i feel like it would allow for more games play possibles to be able to take place within the game overall giving the player a better experience.
In all honesty i dont know how we haven’t came out up with something so simple yet offers a lot more game play potential, i think its probably because we as a team was thinking of more complex ideas to for things to add, like a week ago our team came up with the brilliant idea of adding power up to the game like speed boosts and 2X multipliers with things like this it adds way more of a fun factor and a competitive factor to our game as the player can now strive towards trying the go for a world wide high score on the game.
Animation Journey
As the can see from the title i will be documenting my journey through my process of making an animation for our game. The programs i will be using for this is Photoshop to be able to create the art needed for the animation and i will also be using After Effects to animate the art i produced from Photoshop. I will be using a Wacom cintiq to produce the art needed for this animation.
Before i start i want to say the animation will be based of Aleks story board he came up with for the games as i felt like his story board would be the perfect little intro to animate.
(1st Panel – Base colouring)
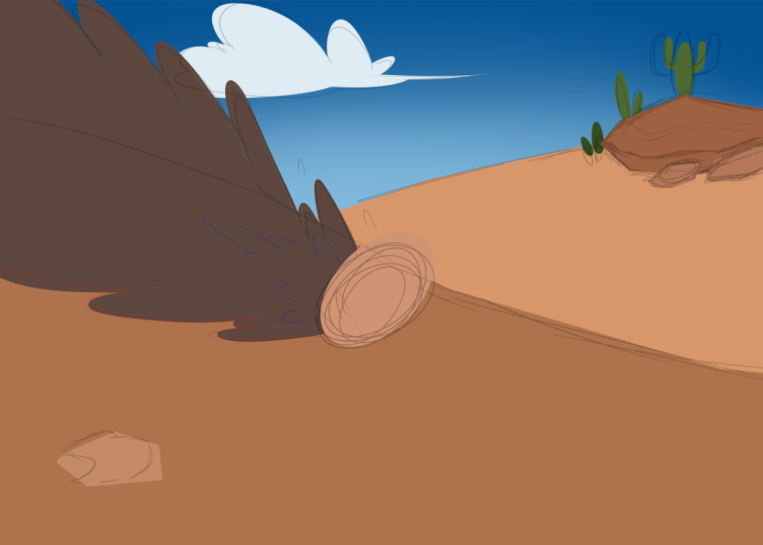
Here is the first scene, i first start out these drawing by doing a little sketch of how i want things to be placed about to just get a feel for the environment i am trying to create. Once ive done a rough sketch i then move on into making folders for each and every ‘asset’ i want to be able to animate in After Effects so in this instance i would have a folder for each and every rock, cloud or buildings in this case i want to be able to move/animate in AE.

Here is the first scene i finished, i think i roughly must shave spent about 4 hours on this piece including sorting and rearranging the layers to make sure everything is already layed out and sorted in After Effects. i would say i am quite pleased with the way this turned out in the end because when i was building up this piece i wasnt quite sure i liked the way it all looked but i am glad i kept on going with it as it has turned out quite nicely in the end. However i do feel like i could have added more detail to the ground because i feel like it looks a bit bare.


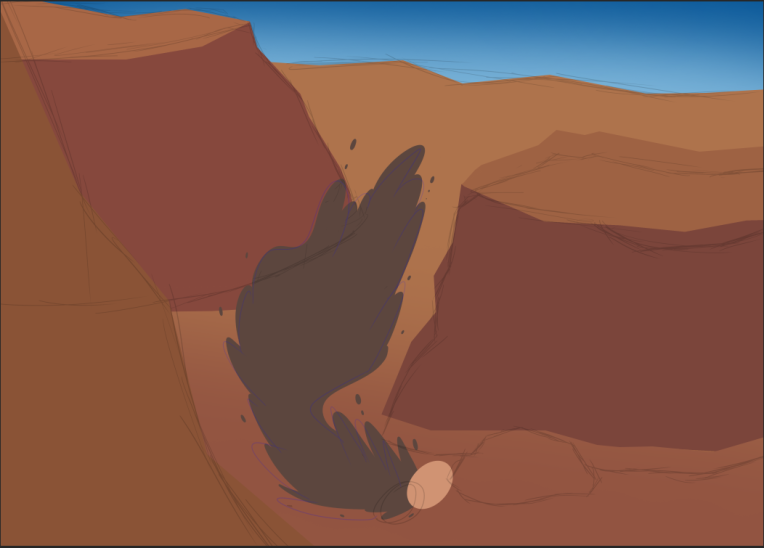
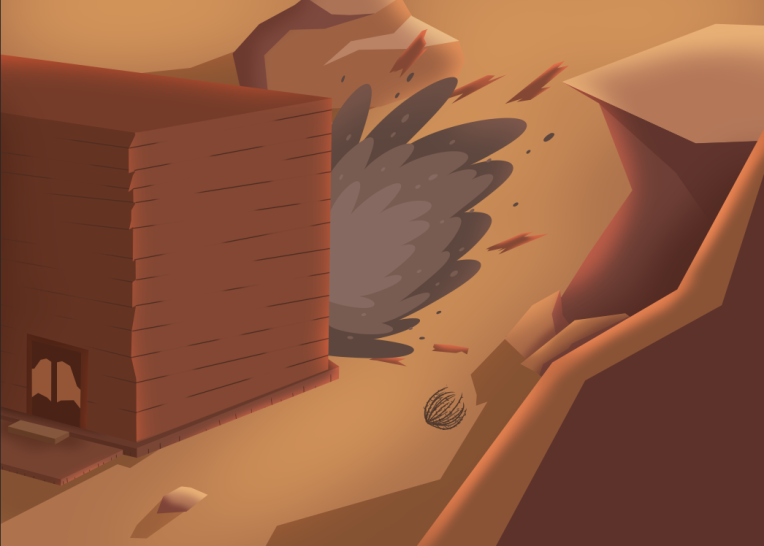
Here is the second scenes rough sketch and base colouring layout, i found it a bit difficult to try and get a feel for the environment.
Here is the second panel fully fleshed out. i really like the composition in this one because i feel like i could do a lot with animating in this piece, like having the mountains in front move as well with the camera which will make the piece more lively in my opinion. this piece originally didnt have any speed lines in it but i felt like it was missing something so i asked my team and they suggested that i should add speed lines to it which really made it pop.
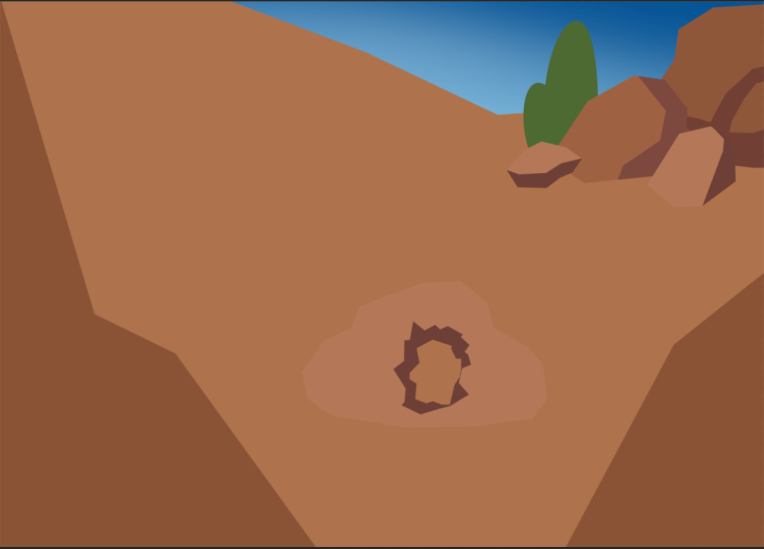
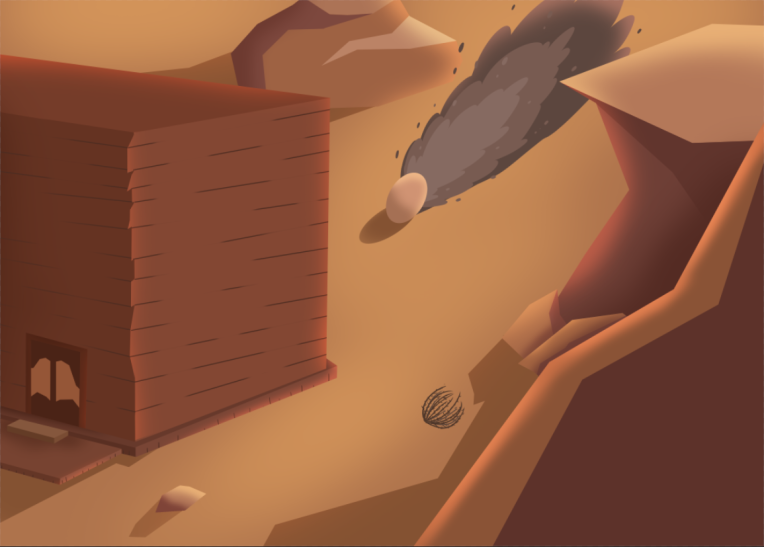
Here is the rough sketch/base colouring of my third panel, i really like the way the scene in this piece is set out it just makes everything look right and not to empty.
Heres the fully fleshed out version of my third panel.

i am really pleased with this piece as i felt like the whole thing just easily came to gether as i was making it, i really like the way the dust from the pangolin is formed, i really try and make sure that the dust looks perfect as that will be the main thing that will be animated throughout the whole animation. i also wanted to try and do a little different style for the rocks in this one and i really felt like it looks a lot better than the other rocks i have made as i felt like it just looked more done than the others.
Week 15
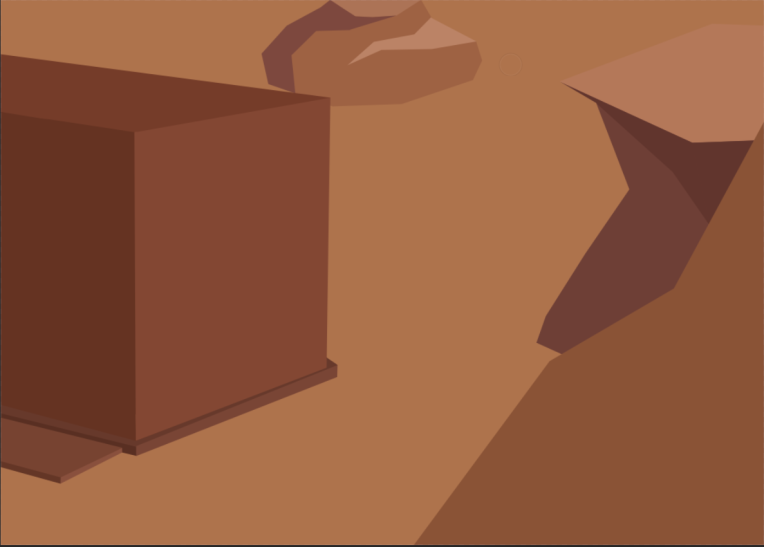
Here is the rough sketch/base colouring of my fourth panel.
 the only problem i had with this piece was trying to figour out how the dust should form and move for the animation and it took me quite a few attempts but i finally manged to draw the perfect form that i liked the most.
Here is the fully fleshed out version of the fourth panel.

i am really pleased with the way this whole piece look especially the way i was able to make certain parts of the drawing glow and really exaggerate the suns light rays, the way i did this was by adding a clipping layer above the drawing i want to draw over then i change the layer option on the clipping layer to ‘overlay’ then i chose i nice bright whiteish colour then use a soft brush then draw over the drawing thus creating a beautiful glow effect.
Master Class
Concept and testing
From watching the master class it covered three ways in which game concepts can be tested; first one is by making a paper prototype and sharing it with others, Second one is a digital Prototype mainly containing a single level also known as a vertical slice, The third method is creating fake ads for the game and putting them on social media and seeing how many people actually click on them. Through these methods we can be given qualitative feedback by asking for their opinions on the game and on what parts feel good or bad.
When we started our project we did not draw a paper prototype or make fake adverts about our game, However we did at some extent make a digital prototype that consisted of; basic movements, the walls in the game to fade when the player is either inside the building or behind them, destroy little objects to gain points and blocked out the environment.
i feel like if we made a paper prototype it could have improved and strengthened or initial concept ideas more and might of given us more time to think about other possible mechanics we could have in our games to increase its fun factor even more.
with our deadline only weeks away i feel like making a paper prototype or making fake ads would only hinder our progression to our deadlines and provide no useful information to us.
Fun factor
from this section i learned that games can be fun for multiple different reasons and companies mainly show this of when marketing their games. fun factor examples, fps are fun for their fast pace action and their challenging skill requirements to play the game or compete with other players, puzzle games are fun for their challenging problem solving skills making the player really think on how to solve them.from this section i also learned that a game can be boring by having poorly done controls or badly designed levels or having the game being repetitive throughout the levels.
i personally think that our game overall is fun to play, this is because during our early development phase people found the game fun to play with being able to smash and destroy objects in the game, However now its quite a bit harder to know if people still find the game fun to play as everyone is kinda in self isolation right now.
one part of the game that i would say isn’t to fun would be the fact that once you play the game a bit it gets repetitive with just trying to destroy all the little objects in the game but a way to get around this i would say is to reduce the timer the player has thus making the game way more challenging making it harder for them to destroy everything in the game leaving them with a much more challenging experience.
UX Design
User Experience design (UX Design) is designing a product that is useful and easy for the customer to use/understand.
I would say that the player can easily understand how to use our game as our main menu is simple and easy to use as it is formatted neatly and easy to read, as of this the players wont really be needing any help with guiding through it. However i do feel like the menu has no way of explaining how to actually play the game in the sense of changing from walking to rolling.
with talking to my team we came to the conclusion to improve the main menu would be to reduce it to three buttons; the play button, quit button (these would be the main buttons), a small button in the corner that takes the player to another window with buttons that lead to the settings for the game, credits and extras. we also decided that the leader board on the home screen could be reduced to show the top 3 high scores, then the full top 10 would be shown at the end of the round as perusal. This would stop the menu from being to clustered for the player to understand.
Here is the base colouring for my fifth panel.
 i am really like the way i am making the rocks in this one as i feel like these ones have much more detail to them and thought about the way they are formed and fit into the scene compared to some of my other panels.
Here is the fully fleshed out version of the fifth panel.
 I have to say now this is probably the best drawing for this animation i have produced so far, i say this because i love every thing about this piece to the amount of detail i put into to the layout of everything in the scene, i also really liked the way i made the shadows in this piece as i feel like this really addeds more depth and detail to the whole piece instead of having really big and soft shadows like the ones in my other drawings.
Here id the base colouring for my final panel, i plan on having two parts to panel sixth.
 I really had to keep looking back and forth between panel 1 and this panel because i really needed to make sure the whole scene looks the same as the first panel because if i didnt it really wound’t make any sense at all so it was a little bit challenging to basically redraw the first panel but at a different angle.
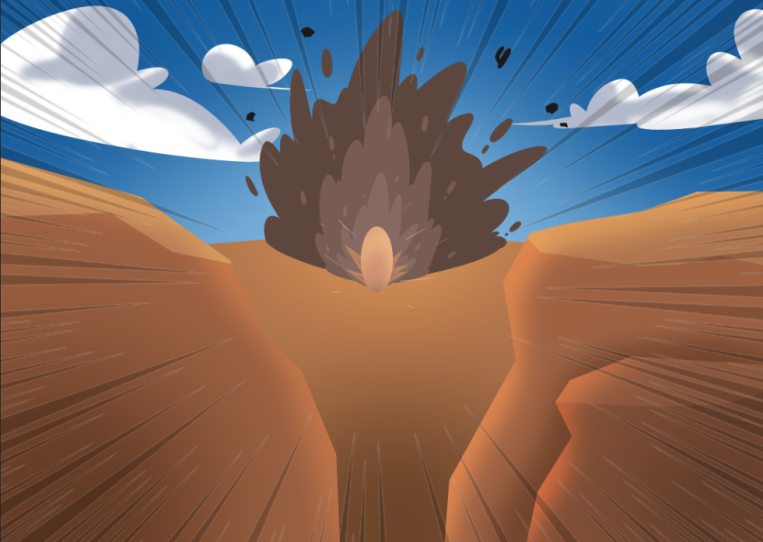
Here is part 1 of the sixth panel fully fleshed out.
I am really impressed with my self for drawing this sense, i really love the lighting and shadows in this scene and how i was able to redraw the saloon perfectly from a different angle i really thought that would be a big issue for me but it turned out really good actually. i also really am pleased with the way i was able to add detail to the house and the rocks making them so much better looking than the other ones i made, this is probably all based on the fact i spent roughly 5 to 6 ish hours drawing this whole piece as i thought since its my last scene i should really spend as much time as possible trying to make this look like the best scene.
Here is part 2 of the sixth panel fully fleshed out.
 i made a part two for this panel because i thought with the way this scene is layer out i could probably get away with adding the explosion caused by the pangolin crashing into the saloon although i do feel like i might end up struggling with animating this piece based on the fact there will just be so much to animate in one scene and After Effects might run incredibly slow or i might struggle trying to find a way to transition part two into the scene while animating it. so in the end well just have to see how i will play out but i can say i will most definitely find a way to get around it to make it work anyway you look at it.
As soon as i was finished and happy with the drawing i went back through them all and compressed/merged some of the layers in the drawings, the things i merged were mainly the clipping layers just to makes sure everything is sorted and layered properly so im not having any issues when it comes to animating the drawings.
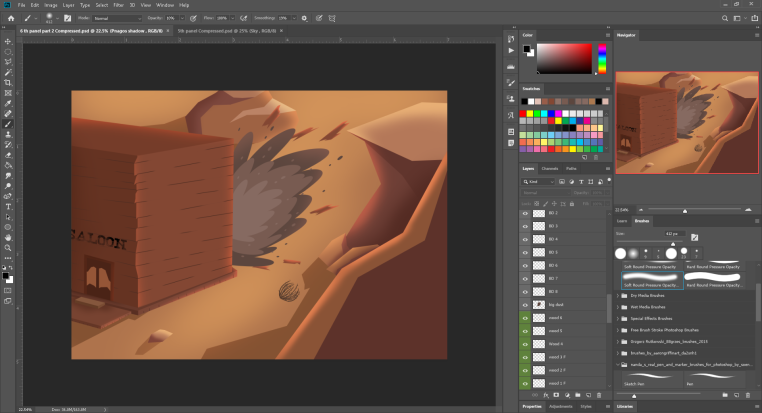
as you can see my layers are now a lot more organised and named so i know what exactly i am working with when i bring the whole thing into After Effects.
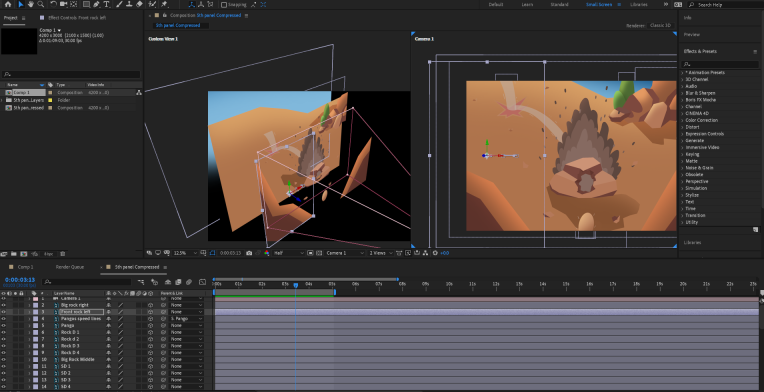
Heres a little screen shot of what im working with in After Effects.
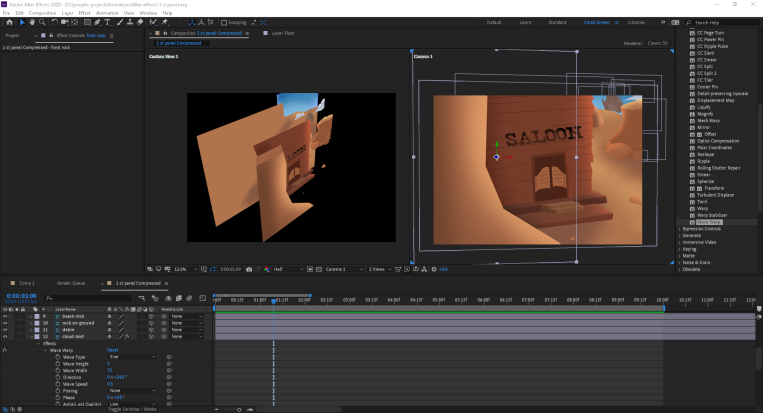
First thing i do in After Effects is make sure i turn all of the layers into a 3d object to that i am able to work with the layers in a 3d dimension with this i am able to make the scene look way more 3d, especially when i bring the camera into the scene, once i do this i can animate the camera to tilt to either side, zoom in/out and move up and down which really gives the scene that 3d feel and look to it.
Second Panel in After Effects
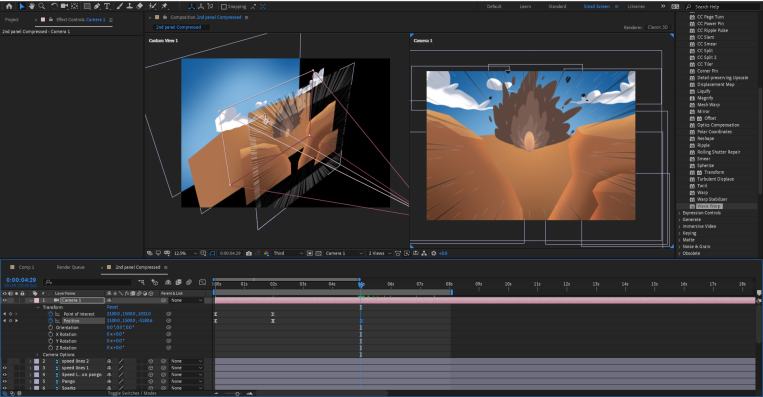
One thing i found really challenging while animating this was trying to come up with the camera movements and what would really work with this scene the most, so this resulted in a lot of trial and errors for the camera movements but i gotta say i think i got them down pretty well for this scene tho.
Heres a little video i rendered out of my second panel that i fully animated
i am really pleased with the way this one turned out, despite the amount of times my After Effects randomly crashed or took ages to render out my animations i was dedicated on getting this one done. The motion/flow of this animation is really were i felt like i shined at, just the way the clouds and rocks move all together as the camera zooms in really makes it all feel so smooth, the way i achieved this effects was by editing the speed graph of each asset and making it so that its slow in then really fast in the middle then slow moving out.
(Here is the speed graph i was talking about, thought it be better to show you it because i am terrible of explaining this) 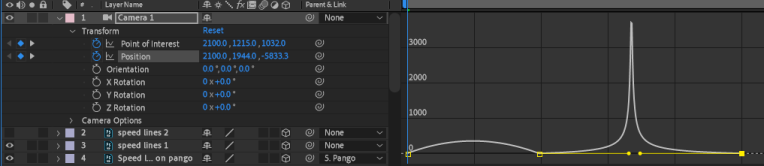
Panel 3 in After Effects
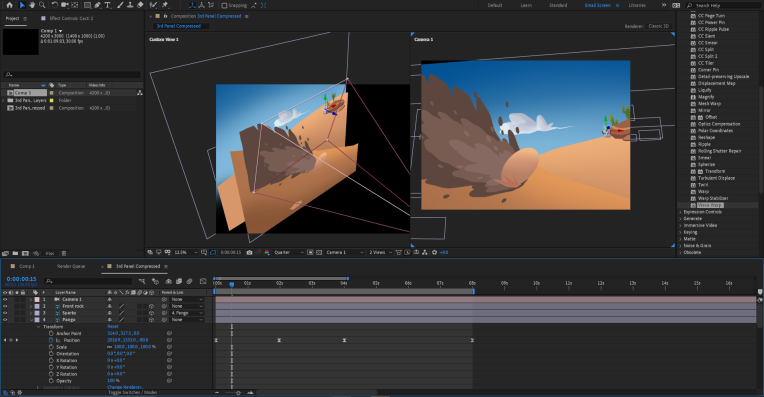
I would have to say this scene was probably one of the more easier ones to animate as there wasn’t to much going on in the scene which resulted in the program not freezing/crashing at all making this one an easy and quick scene to animate with very little trouble.
Panel 4 in After Effects
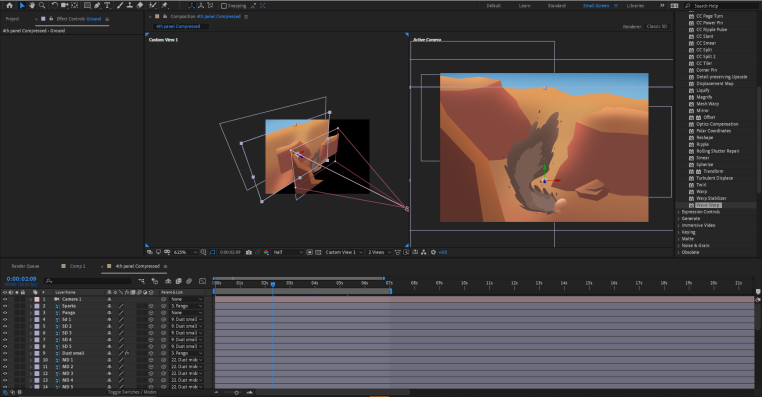
I struggled a little bit on this scene because i wanted to see if there was any way i could get the dust from the pangolin to wrap around the rock to make the scene look more 3d but i figured that that was going to be hard based on the way my layers were set up and i didn’t think it was possible to have half of the dust pulled further back than the rock without making the dust look distorted so i just had to settle with making the dust come in front of the rock.
Week 16
Panel 5 in After Effects
I really wanted to carefully spend my time on this scene based on the fact i put so much effort into drawing this scene so its only natural that i took my time with this piece, however there was something i realised when i was working on this piece was that while doing my drawing i never actually kept in mind that i would be scaling some things up and down and moving them back and forth in a 3d dimensional way which has resulted in some of the shadows in the scene to not match up properly but i was able to solve that issue in this scene by not scaling the environment up to much for the shadows to look of.
Panel 6 in After Effects

This scene was thee most hardest one i have ever animated before in my life, i had for to many things in this scene, i think i had about 90-ish different layers to animate in this scene which resulted in my After Effects crashing multiple times (typical after effects) so to sum what get around this i had to constantly save after every 10 minutes or every time i animated loads of little things. i was originally gonna animate this part in two bits before the crash and after it, but i thought i would be able to mange doing them both together as i though the transition into the next part would be a lot smoother if i had it all in the same project but i forgot how easy After Effects can crash. Overall i am really pleased with the way this scene turned out, i really think i got the camera moments down and the flow of the whole scene perfectly, i also really love the way i was able to get the dust in the first part to form by using the Wave Warp effect.
Here is the final panel fully animated and complete.
i decided to render out the final scene because i wanted to see how it would look in YouTube and see if i would spot any issues that might arise when rendering but everything turned out fine which was surprising. Once i was doing with animating i rendered out all of my animations into mp4s through use of media encoder to reduce the file sizes of each one of them, once im done with that i placed all of the mp4s into another project on After Effects then sort them out while adding in some western theme music that i feel really goes with the mood of my animation or is best fitting for it.
Here is the animated opening for our game fully completed.
Here it is the end of my animation journey and all i can say is that i am pleased that i deiced to go for this and do it, i originally wasn’t going to do an animation for our game but with some thinking and with quarantine going on still i deiced i will give it a shot as i will have more time at home so i would be able to dedicate my time in the day to only animating and i can say it defiantly payed off. I really do think by doing this i have improved my skills in both drawing and animation and i can really see the difference in this animation and compared to my last animation, with this animation i learned that i could also mess around with the speed graph values which really played a huge part in making my animation ten times better.
Week 17
from now on i think i am going to try and push for little assets for our game with the little amount of time we have left.
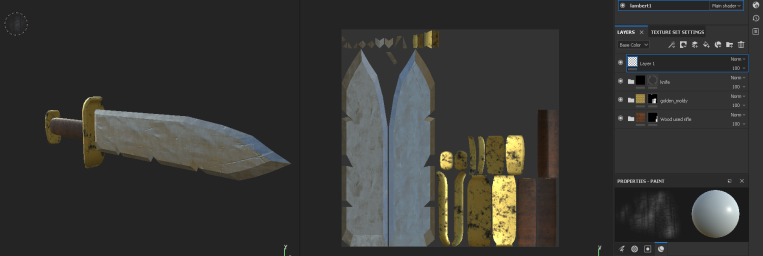
Here is the model and wire frame for a knife for our game, we plan on using the knife for detail in our game like it could be stuck in a table in the saloon or in a wall somewhere just for detail, in no way it will be used for violence at all as guns and weapons are not allowed at all in the synoptic project. the only issue i had with making this knife was the actual blade itself, i just quite couldn’t get the blade to be pointy with out making the whole thing look like a mess, so the way i got around this was by making an edge loop through the blade and then pulling it out for a point which ended up working quite well in the end.

Here is the finished version of the knife, i am really pleased with the way it turned out like the form of the blade, the colours and the rusty and used texture to the blade really makes it look like it belongs to its environment, i ended up yet again looking through substance shared to try and find some textures that best fit the ideal image i had in mind for the knife, once i found my best 3 i added them together and did a few touch ups to really bring them all together to produce the final look.
Week 18
Heres the final update to the burn down sheet for our game.
as you can see in the file that we ended the project a little bit behind schedule, this mostly stemmed from the amount we were facing from quarantine as some of our team members were unable to work to the best of their abilities form home resulting in some of use taking on extra work to try and get as much as we can done, However i feel like we still ended the project with just enough work done for it still to be an amazing game to play and enjoy
Final Submission
Here is the video for our finished product for our game Pangomonium
Here it is finally, after months of hard working and pure determination we now meet the deadline for this project. i am so pleased with the quality of the work i was able to produce for this project i feel that i have produced some of my best work yet working on this project, as i really pushed my self out of my comfort zone when it came to my 3d modelling skills as i never really imagined that i would be using the baking method as much as i did and i can most defiantly as it payed of. as well as that, i also used more of the complicating setting/tools in Maya to achieve a better looking and higher quality assets as well, even on some occasions i manually UV unwrapped some of my more important models which was worth the extra half an hour or so if it meant it would look 10 times better when it came to texturing them. i have also defiantly noticed how much better i have gotten when it comes to model from looking at my last project, like this time around i have defiantly taken my time when it came to modelling to go into soo much more detail and its really payed of. Overall i am very pleased with my teams hard work to bring this game to life especially with the amount of set backs we all have been facing in these hard times.
Conclusion
In my personal opinion i would say that my synoptic project went absolutely amazingly i enjoyed every single bit of it, from a single concept we made this amazingly fun and enjoyable game in just a few months with my incredibly hard working team without their help our game wouldn’t have came as far as it did, so i am just so grateful for their dedication towards the game.
when starting this project i had a simple plan on just making assets for the game and making the best to my ability but i ended up going further on with my work, i even ended up baking some of my assets because my team kept pushing me to do so and i can say i am so thankful that they did because them assets came out better than i ever expected. i can also say i ended up over achieving my plans as i was originally never going to produce an animation for our game but with us having to work from home i ended up having a lot more time on my hands which resulted in me having the determination to make one which was 100% worth it and i enjoyed every singe bit of it, i even developed my art skills further from doing this as well.
I would say that we defiantly created a project that for the most part perfectly fitted the industry brief, our concept ideas fitted the theme of Untitled Goose Game, as our game defiantly followed a path of mayhem and destruction as its main focus. However we were unable to have a fitting funny or unique main character as we ran into a few technical issues that prevented us from having so but we worked with what we could and delivered a game that best fits the theme of mischief and destruction as much as we could.
My highlights from this project would have to be; making the bank because i was really enjoying the amount of hours i put into that asset and the amount of little details i was adding made my experience really relaxing and calming, i was also exited to see how well it would look once i baked it but we know how that turned out, although i was impressed with my self in how i didn’t let a problem like that didn’t discourage me from finding a way around the issue and still producing the asset to the best of my abilities. Another highlight from this project would have to be my animation journey, i loved every single bit of making that animation from producing the art to animating all the little assets in the scene, i was really impressed with my self from how much i improved from my last animation i did and how this time around i played around with more setting that really payed of because i feel like this animation has got a lot more flow and motion to it compared to my last one.
the one this i could have improved on while doing this project would have to be my time management, i say this because some weeks i would have too much work to try and get through and the next i would have very little amounts. i feel like this problem stemmed from the fact i didn’t calculate the factor that i would run into any technical issues or problems that would set me back, this could have been resolved by me leaving the last 2 days free on the end of each week to make sure everything I’ve made in that week is perfectly fine and has nothing wrong with it. from doing this i would of had a way better time schedule for working on my assets but however i always find away around my work so it all worked out in the end.
Advice i would give a first year for moving into the second year for this project would have to be routine and planning. Planning out how your going to approve this project is essential in succeeding and making sure everything runs smoothly and also plan for extra time in your weeks trust me not everything can run smoothly you will most defiantly run into some unexpected issues while working on this project wither that be a technical issue or an issue from your team, so with that in mind the only thing i would recommend you do is plan spare time into your schedules. i say routine because one thing that kept me moving through this project was getting into a routine to motivate me into consistently working on this project everyday and trust me it works (this coming from one of the laziest people you’ll ever meet), how my routine worked during this quarantine was i wake up every morning then got straight into working for either 4 hours or longer depending on how motivated/invested i was into the work i was doing and this proved to be the most effective method of getting me to work, however it might not work for you, you might like doing your work some other time of the day. All i can really say is routine is important and its up to you to find out and create your own routine that best fits your work flow.
Overall, i am ecstatic to believe we came soo sooo far with this game and how incredibly hard and dedicated my team was working on this project.
Documentation
Scrums
WII 5
Here are a list of SCRUMS that we will make through the process of this project, SCRUMS allow our team to share their individual process throughout the project while also allowing us to
Means of communication
here is our means of communication, my team has mainly been using Microsoft teams and a little bit of discord to communicate with each other or share files back and forth with each other. Using Microsoft teams has been mainly our way of communication as we all are stuck in quarantine at the moment however because of teams our work flow has barely been hindered as we are fully able to talk to each other to; ask questions, conformation on current progress with work, see if there are any issues anyone has ran into and check up on everyone at time to time. through the use of teams it has kept our team quite organised as we have frequently talked to one another, making sure everyone working fine and well.
Play Board
SP 1 and SP 2

Here is our story board for our game (created by Aleks), this depicts the nature of the game and some mechanics that will be present in the game whiles also showing the kind of environment the game will be setting in while also showing of the nature of the character its self.
Story
Here is a little story behind the game just to make everything make sense ad how it came to be.
Burn Down
WII 6
Here is our Burndown chart for our project, this helps us to see if we are either falling behind, on track or ahead of time on our project. through this it can tell us if we are able to work on extra things to improve our game or cut of some features in our game to be able to have a completed game before our deadline hits.
Asset List
Here is our games asset list of all the assets that will be present in our game and are hopeing to have them all finished by the time our deadline comes around, we have assigned our self to each asset we feel like we would be better on while also sorting them out with colour codes to show which ones would be more important than other ones so we can priorities which ones need to be done and out of the way first.
Production Schedule
PM 3, PM 5
Synoptic Project Production Schedule Template
Here is the teams production scheduled help us keep on track with our work to make sure non of us is falling behind on work and to remind us to keep on time with our work flow so we don’t have to end up cutting some features/assets out while nearing the projects deadline, or to let us know if we are getting ahead of our schedules so we can go helps the others in our group or improve on the previous assets we’ve.
Synoptic Project Personal Production
PM 4
Here is my personal production schedule that i made to help me keep on track with my work to make sure i dont end up falling behind on my work. i made sure that i had well enough time to finish one asset per week while also starting to model my next asset due, i also made sure that i get my most important assets done early so they dont end up getting cut out in the end of i dont end up having enough time to do them, but also i made sure to keep some time free nearing the end of the project just to give me extra time to either improve some of my work or help others.
Technical Considerations/Specifications
Audio Plan
Here is our new audio plan, we had to cut some sounds we had in mind due to some features being cut out of the game, in addition to this some sounds we were going to make our selfs now have to be sourced for online due to the fact we cant go outside to record them
OLD VER:
ISISW 3
The audio in our game will be mostly diegetic to build the environment in front of the main characters eyes while also having non-diegetic to build the environment around the character.
Priority Key
High
Medium
Low
Diegetic:
Wall break- us
Table/ chair/crates break- us
Hitting a character(cowboy)-https://www.youtube.com/watch?v=9BSAzlH4KPc (punch2)
Wagon break- us
Bottle smash-https://www.youtube.com/watch?v=KTNz964fEuE
Saloon doors- us
Non-Diegetic:
Vulture sounds-https://www.youtube.com/watch?v=FHcxQ8c0QOo
Saloon music-https://www.youtube.com/watch?v=iLmTMn_eYd8
Menu music-https://www.youtube.com/watch?v=VDPMAuv-3nk
Wind-https://www.youtube.com/watch?v=A5vFFEa-q_8
